
While working as a freelance engineer in a prominent Brighton studio I saw that here lay an excellent opportunity to properly exploit a decent live room and a large selection of microphones (a combination of ribbon mics with my own extensive set of small diaphragm condensers) in order to once and for all produce the kind of drum sound that provokes wet dreams in any fan of Steve Albini, and probably be the only studio in Brighton with the foresight to do so. With that notion, and with the promise of a kick drum sound capable of producing an internal haemorrhage elusively wafting through the air, I set to work in order to discover exactly how it is done, and exactly which mics and techniques are appropriate to induce such biological phenomena in a laborious weekend of tedious excitement. Aided by fellow engineer Chris Blakey, and musician and professional cable winder Genti Aliaj, these were our findings.
The Approach
All tests were conducted through a Neve 5316 using the console preamps, recorded to Pro Tools 9 HD at 96 KHz, 24 bit, and monitored through NS-10Ms and KRK VXT6s.
In order that the best drum sound could be obtained, the approach was logical and methodical:
- Get a decent sounding drum kit.
- Tune and dampen it as appropriate.
- Create a deadened environment using a surround of acoustic screens.
- Set up one drum at a time within this dead space and find the appropriate microphone and position.
- Reassemble the kit using the close mic techniques found.
- Listen for spill and reposition microphones accordingly, without compromising the sound.
- Test overhead microphones and positions.
- Test M/S microphone and positions.
- Test ambient microphones and positions.
- Experiment with processing.
It seemed to me that with two days meticulously analysing the drum kit in this way, it should become apparent exactly which microphones are more fit for task than others, and what techniques add to or detract from the overall sound.
Snare Drum
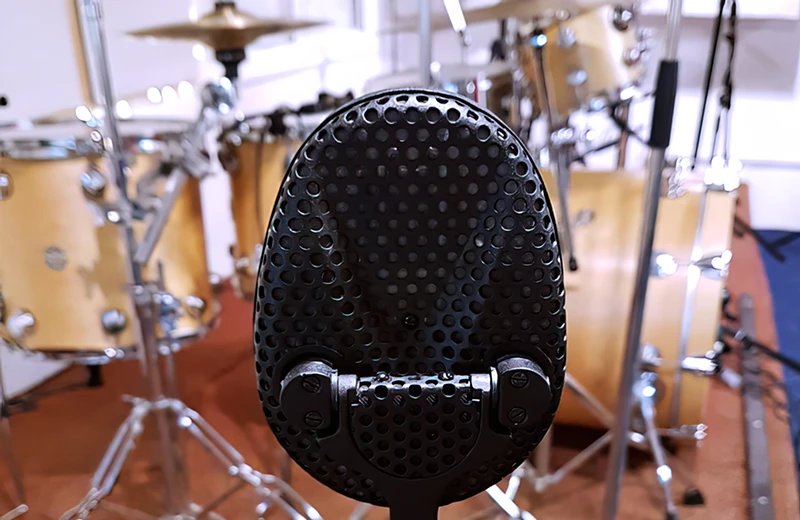
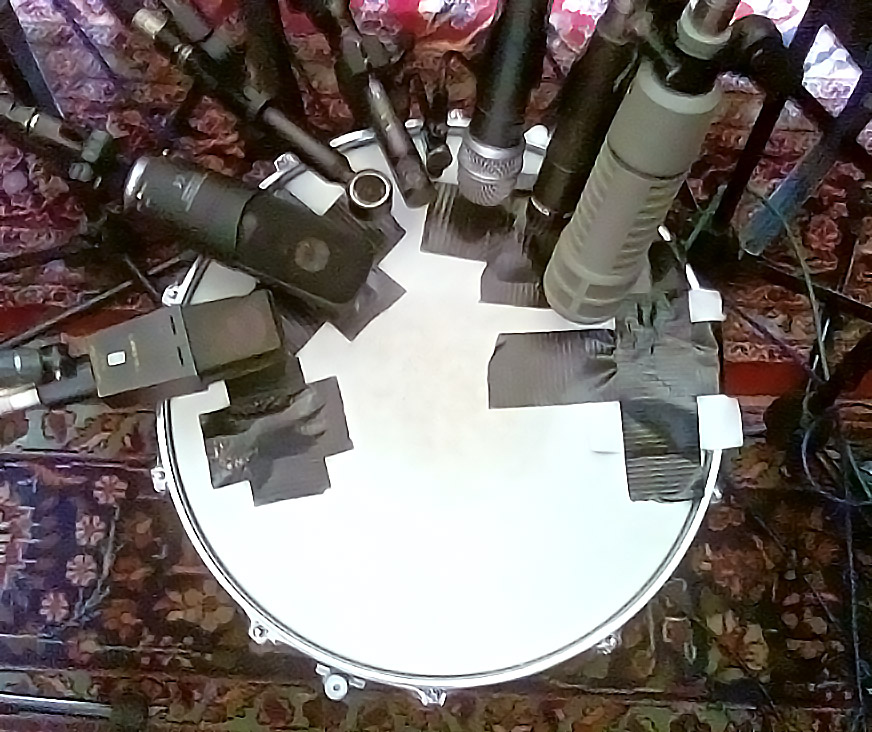
The snare drum was set within the screen and a selection of microphones aimed at it, in order to approximate recommended techniques suggested by various engineers over the years who may or may not have engaged in this kind of direct comparison. In total 8 mics were used, with diaphragms aligned as closely as possible, each pointing fairly flat against the drum head, around 1½ inches from it. This position seems logical, since aligning the diaphragm parallel to the drum head allows the greatest frequency energy of the drum as a resonating system to drive the diaphragm of the microphone, without passing obliquely across it, as is the case in a non-parallel placement. Indeed, adjustments to this end found that aiming the microphone at the point of stick contact, whilst possibly capturing fractionally more attack, does seem to incur a slight bass roll-off, which is a particular concern with condenser mics where this content is particularly important (since their sound is very different to the dry, bone-headed “thump” delivered by a dynamic).
During the test, each mic was analysed relative to the others for its particular qualities and ranked in order of “likeability”, based on its character and its frequency content. The results were as follows:
| Microphone | Rank | Comments |
|---|---|---|
| Shure Beta 98 | 1 |
Bright, full bodied sound. Very directional but with an impressive amount of high end detail and a surprisingly thuddy bottom end. Everybody’s favourite by a long way. Its small size and gooseneck clip also makes it excellent for positioning. |
| AKG C414 | 3 |
A good, rich, unimposing tone, although with less “wow” factor than the aforementioned microphones. However, its physical size and cost render it probably inappropriate for all except the most affluent of engineers. |
| Josephson E22 | 4 |
The darling of Electrical Audio. A surprisingly dark sounding small diaphragm condenser microphone – its advantage is its rigidity and its directionality, however its top end response seemed to leave something to be desired. |
| Shure SM7 | 5 |
The brightest of the dynamic mics used, but still ranking below all condensers in terms of overall detail. Again, its physical size makes for problematic application in a real world scenario. |
| Shure SM57 | 6 |
Peculiar sounding dynamic microphone that has somehow found its way into the recording aether as a “workhorse” multi-application standard. In this test the SM57 ranks far below every other microphone so far discussed, with a very boxy, artificial sound that carries no discernible benefit other than the fact that you can happily throw it at a wall and find it still sounds the same. |
| Shure Beta 57 | 7 |
Even worse than the SM57, this microphone imparts a very noticeable high mid boost that forces its own character upon the source sound, producing a Frankenstein reproduction of a sound that could never exist in nature. A very poor mic. |
| Electrovoice RE20 | 8 |
This microphone ranks lowest only in as much as it was simply tried as a “bit of fun”. Dark, lacking in high end, physically large and intrusive, and expensive, this microphone is completely and utterly inappropriate for this application in every conceivable way. |
With the most appropriate top-of-snare microphone now established, the next job was to determine the bottom mic. It therefore stood that in order to determine this, the designated top mic – of which we had only one – should remain on top whilst bottom microphones were tried in conjunction with it, in order that we could assess which complimented the top mic the best. We tested 7 microphones at the bottom of the snare, each time inverting the polarity (not phase – if you are of the school who think that phase and polarity are interchangeable terms then shame on you, and I will shortly be having words with your mother) so as to properly manage the conditions inherent in two microphones at close range pointing at each other. Taking a small moment to elaborate on this, because the bottom microphone receives the vibrations from the resonating drum head 180° out of phase with the top mic, either one of the corresponding channels should be polarity inversed, thereby adding further definition to the sound of the drum whilst avoiding low frequency cancellation, and also serving to cancel out any extraneous environment noise (like traffic or bass amps), since such noise arrives at the two microphones more or less simultaneously. This is known as a differential principle.
| Microphone | Rank | Comments |
|---|---|---|
| AKG C414 | 1 |
Surprisingly complimentary sound with great separation and nice, rich body, rendering the overall drum sound extra punchy. A good range all round with a top end that is not too harsh. Very easy to place underneath the snare so physical limitations are no issue. Easily the best choice. |
| Audio Technica ATM450 | 2 |
Nice and bright (which is what you want in a bottom-of-snare mic) with a fast response, but lacking the depth of the C414. Still provides a good deal of snap. |
| Josephson E22 | 3 |
A slightly darker, slightly drier version of the ATM450. A good mic but not first choice in this application. |
| Shure SM7 | 4 |
Spits out a pleasant thump but lacks the top end detail of the aforementioned mics. Sounds as you might expect a dynamic mic under a snare to sound. |
| Sennheiser 441 | 5 |
Slightly richer than the SM7 but lacking in top end, rendering it fairly uncomplimentary to the top mic in this application. |
| Shure SM57 | 6 |
Characteristically dry, nondescript sound, not really useful for anything. Less thumping than you might expect and exhibiting extremely poor top end clarity. |
| Shure Beta 57 | 7 |
Entirely ridiculous. All artificial mid-range and nothing else. Sounds like a mechanical sneeze. |
Rack Tom
Although the microphone positioning in this case was based on identical principles as on the snare drum, the analytical process for the rack tom was slightly different, because essentially the mic that is fit for purpose on the top of the drum should also be fit for the bottom, given that the source is more or less the same:
| Microphone | Rank | Comments |
|---|---|---|
| Josephson E22 | 1 |
This is where this mic comes into its own. Great attack and full body, nicely preserving the detail of the drum. The darker tone serves to enhance the tom sound very nicely without accentuating any irritating wolf tones. |
| AKG C414 | 2 |
Another nice, rich sound, with slightly less attack than the E22, but still pleasantly full-bodied. However, again it is physically intrusive and makes a great target for a drum stick. |
| Audio Technica ATM450 | 3 |
Slightly less body but good attack. Still a nice clean sound, but possibly not the first choice should an abundance of E22s be available. Having said that, there is absolutely not £500 worth of difference between this mic and the E22, and given its price, small profile and excellent position-ability, this is a great little microphone. |
| Sennheiser 441 | 4 |
A bone-head dynamic sound – nondescript and characterless, but “gets the job done”, if what you are looking for is the lower mid thump without concern for detail. |
| Shure SM7 | 5 |
More attack and less body than the 441. It’s passable, but it would be a strange engineer who considers this an appropriate microphone for any drum. |
| Shure Beta 98 | 6 |
All attack and no body. Strange, because it sounded so rich on the snare drum, but for a rack tom, this mic lacks the required depth to sufficiently reproduce the desired boom. |
| Shure SM57 | 7 |
Sounds like an SM57 – dull and lacking any redeeming features other than there tends to be lots of them about. |
| Shure Beta 57 | 8 |
Quickly becoming the stupidest sounding microphone. More imposing mid-range nothingness and entirely inappropriate for use on a drum kit, or, I suspect, anywhere else. |
All in all, the E22 was clearly the most appropriate microphone for the rack tom, however, given their price at around £700, the likelihood of owning enough of them with which to entirely coat a drum kit is very small, unless you happen to be the man who conceived the design. We were lucky to have one to try out, but given the price difference of around £500, there is nothing whatsoever wrong with using the ATM450, which is lucky for us because we have an abundance of them. Where the E22 really scores points however is in its robust design and (as we were to discover later) its superior directionality, meaning that spill from the rest of the kit is less of an issue. However, the ATM450 has pretty good off-axis response, meaning that, even though it does pick up the rest of the kit more than the E22, it never actually sounds bad. Just be careful that your drummer doesn’t smack it with her stick.
Floor Tom
It is probably unsurprising that the floor tom test harboured almost identical results to the rack tom test, save for some inconsequential ambiguity regarding whether the ATM450 was actually better than the C414 this time around. Either way, It’s pretty clear by now that if you are financially privileged enough to own enough E22s, this would almost certainly be the tom mic of choice, otherwise the ATM450 comes a close second. Either way I believe that you are going to end up with a close drum sound that boasts superior depth and clarity to the standard practice of using only dynamic microphones on the top heads:
| Microphone | Rank | Comments |
|---|---|---|
| Josephson E22 | 1 | |
| AKG C414 | 2 | |
| Audio Technica ATM450 | 3 | |
| Sennheiser 441 | 4 | |
| Shure SM7 | 5 | |
| Shure Beta 98 | 6 | |
| Shure SM57 | 7 | |
| Shure Beta 57 | 8 |
Kick Drum
When we came to examine the kick drum it was quickly established that the position of the mic had more bearing on the sound than the mic that was used. While every mic exhibited its own character, each of which could potentially be useful in different applications dependant on the style of music, the positioning harboured radically different results. Firstly, here is a brief analysis of the four mics tested at the hole of the kick drum:
| Microphone | Rank | Comments |
|---|---|---|
| Electrovoice RE20 | 1 |
A great, full bodied microphone that really highlights the accompanying “boom” of the drum, as well as the attack sound. However a great deal of gain is required to produce suitable performance from the mic, and therefore decent preamps are advised that are suitable for the task. |
| AKG D112 | 2 |
Toppier than the RE20, it is actually a matter of preference which one you may decide to go for, with equally good attack and a mid-range that sounds… just… different to the RE20. |
| Audix D6 | 3 | Apparently designed as a “metal” kick microphone, and you can definitely hear it, emphasising as it does the clicky attack that is a staple of metal music everywhere. |
| Shure Beta 52 | 4 | Not dissimilar to the D6, it only ranks lower because its physical shape renders it slightly harder to position. |
The problem, however, was that, in the regular placement – just at the sound hole at the point where the greatest volume of air is being ejected from the drum – all of these microphones sounded peculiarly plasticky and weird. When listening to the drum in the room it sounded large and booming and just as you would hope a kick drum would sound, but under the microscope this was not the case. In order to remedy the situation, an AKG C414 was slowly moved around the outside of the repeatedly pounded kick drum while we determined to find the sweet spot at which the non-plasticky boom could be sufficiently captured. This transpired to be around 2 feet in front of the sound hole, where this microphone was subsequently positioned. This did bring to mind the idea that I now recalled from other engineers, that a condenser mic outside of the kick drum could sound quite nice, and here we seemed to have confirmed it. It had lots of attack and lots of boom, but the only component potentially missing was some extreme bottom end. Use of a Yamaha Sub Kick right against the resonant head seemed to provide the thud we were looking for, and when compared to the C414 with artificially boosted low end, it resulted in a much more natural sound.
C414, 2ft from Hole
Yamaha sub against resonant head
An important component of a good kick drum sound however, and one that is almost always overlooked and then attempted to be fixed at the mix stage (usually by boosting somewhere around the 1-3 KHz mark) is the attack. It is this that is clearly audible in recordings, not the sub. The sub is something you feel, but the attack is something you hear. This is an important distinction to make, because I have seen many people (myself included, some years ago) trying in vain to boost the sub part of the kick drum, ever wondering why they are not able to allow it any definition through the sub frequencies of the rest of the mix. We all know the feeling of the bottom half of our mixes turning into a definition-less squelchy mulch of non-descript boom, without ever really being able to tell what is happening down there. And so the solution to this is to take care to faithfully capture the attack component of the kick drum by separately miking it. The bottom end of this signal can then be rolled off in order to achieve a piercing beater slap that accentuates the kick sound without ever having to boost silly frequencies in the mix. Obviously for this application a suitable microphone is any that has good high end definition but is also easy to place in such an awkward position. Three mics were tried in our test:
| Microphone | Rank | Comments |
|---|---|---|
| Audio Technica ATM450 | 1 |
Great attack and full bodied, plus physically small. Combined with an Audix D-Clamp mounting clip, this is very easy to manoeuvre into a very close position. Just be sure it doesn’t get thudded by the beater. That wouldn’t be good. |
| Shure Beta 98 | 2 |
Excellent attack but lacking definition lower down in the spectrum. Also comes with a clip that looks like it is purpose built for this exact application, but after some frustrating fiddling you find that it really isn’t. |
| Sennheiser MD421 | 3 |
Boring dynamic nothing-special microphone that did nothing special in this application except got in the way. |
Assembling The Kit
Having determined the best microphones and relative positioning, the kit was assembled and all techniques applied with a view to checking how spill from the rest of the kit affected our choices. Happily, spill was hardly an issue, and in fact the benefit of dual miking drums was further accentuated in this regard, as having two microphones in different locations pointing at a single drum serves to enhance the character and definition of that drum whilst cancelling spill from elsewhere in the kit, or at least widening the relative signal-to-noise ratio. I suspect that this is therefore a critical consideration in using condenser microphones as close mics on a drum kit because, although sonically superior to dynamics, the advantage of dynamic mics is their off-axis rejection and poor high frequency response, meaning that crashing and clattering cymbals from elsewhere on the kit tend to interfere less with the dull character of the dynamic microphone. Therefore, as a rule of thumb, for excellent drum definition with condensers, use two of them.
The only instance in which spill was a noticeable concern was with the C414 in front of the kick drum, which by now was reproducing less of the boom exhibited by a single kick drum being repeatedly and consistently struck on its own, and more of the cymbal clatter from the rest of the kit. It had lost definition, and it was apparent that a closer technique was required in order to produce acceptable separation. It quickly became clear that a sound hole microphone could actually be used, so long as it was angled in such a way as to minimise the plastic tone of the beater slapping against the drum head. This was achieved by simply moving the mic off axis in relation to the beater. Still slightly plasticky, implying that there is some as yet undisclosed issue with the internal acoustics of that particular kick drum, but far less problematic than before, and with acceptable depth and precision. An RE20 was used in this application.
Overheads
Overheads were assessed in two ways; by exchanging microphones and by raising their position above the kit. The fundamental technique however always remained the same: both microphones positioned in a straight line either side of the kit, face-down directly above their respective cymbal clusters. Incidentally, it was a point of contention between Chris and I regarding which overhead microphone is considered “left” and which is “right”, with my firm belief that, as a drummer myself, it is appropriate for the stereo spectrum in the mix to be situated in a way that makes sense to the drummer – a right-handed drummer has his high-hat on the left-hand side. Anything else is disorientating and conducive to travel sickness. I fully accept, however, that not everyone shares this view, and some (most, probably) consider it appropriate to balance the mix from the audience’s perspective, rather than the musician’s. Personally my view is that the music was created entirely from the musicians’ perspective, from the composition to the lyrics to the performance, and therefore the recording and mix should reflect this and not be tailored to the perspective of an abstract person whose role is no more than an observer. I understand that a gig scenario has different connotations because a large audience is actually present and looking at the band, and therefore probably expects that their visual reference correlates with what they are hearing, but a recording is a musician’s opportunity to speak, unobserved, directly to an audience from their perspective. That’s why, to me, the high-hat side (for a right-handed drummer) is always OH L, and the floor tom side is always OH R. But whatever side of the fence you fall on, just make sure that you and any assistant engineers are all on the same page. It could lead to confusion.
In positioning the overheads, it was found that, for a hard hitting drummer such as myself at least, close miking the cymbals was inappropriate in that the attack part of the cymbal felt ear-splittingly harsh, whilst the sustain was largely unrecognised by the microphone. Not only this, but, as is often the case when overheads are too close to the cymbals, the movement of the cymbal creates an undesirable phasing effect. The remedy to this was to raise the microphones up to around four feet above the cymbals, being sure at all times that both microphones were equidistant from the snare, such that the risk of snare phasing could be minimised (an XLR cable makes a handy measuring device for this task). In this position, although allowing more room ambience into the microphone (which, in a room that sounds as functional as this, poses no problem), a good balance of the kit could be achieved with great stereo imaging. There was talk of elaborating on the positioning by trying a coincident pair or some such oft-referred to but curiously never observed technique, but given that the stereo imaging was doing everything we needed it to do here, it seemed inappropriate to change it.
The mics tested were as follows:
| Microphone | Rank | Comments |
|---|---|---|
| Coles 4038s | 1 |
Deceivingly dark sounding microphones, such that on first glance they appear entirely inappropriate until you realise that they are perfectly balancing the kit and smoothing out all the aggressive high end usually present in overhead microphones. Very dry and functional sound without excellent body. |
| Neumann U87s | 2 |
A bright, clattering sound, rich in upper mid detail but inappropriate for this application without significant EQ treatment. |
| Neumann KM187s | 3 |
Very bright with excellent high end detail and transient response, but as such renders clattering cymbals ear splitting. |
M/S Room Mic
An essential component of the “Albini” drum technique is the placement of a cardioid/figure-8 arrangement in front of the kit, with the side mic aligned to face the walls perpendicular to the direction of the kit. The principle of M/S (mid/side) recording is that, whilst a directional microphone captures the sound source, a figure-8 mic captures a stereo image by means of polarity-inverting a duplication of its signal, the two of which are then hard panned left and right. And so it was in this test that, after experimenting with the positioning of the mic in front of the kit, moving it increasingly further back until the most desirable spot was found (around four feet from the kit and 2½ feet from the floor), the resulting trickery harboured subtle ambience which lent itself nicely to the width of the kit. It was however important the right microphones are used, as the initial choice of Audio Technica AT4050 – although a great microphone for many instances – actually sounded too bright and revealing here. Cymbal clatter is a large problem in ambient drum miking, and so use of ribbon mics – in this case the Royer 121 – provided just the right amount of high end roll off that served the sound well, although ultimately, at mix stage, the high end had to be further attenuated to minimise the clanging clutter as much as possible.
Ambient Mics
With the essential sound of the kit now nicely built up, and the drums thumping through the speakers in a way that has not been observed by any of us in any studio this side of Chicago, ambient miking became merely a matter of taste, the essential function of which was to add a little extra something into an already more than serviceable sound. In this regard, we spent little time experimenting with different microphones and placements, but instead went with a tried and trusted technique of using two fairly transparent sounding omni mics (in this case some custom built Panasonic WM-61s – two surprisingly high quality electret capsule mics that I built some time ago) placed ¾ of the way up the wall at the back of the room, thus utilising the principle of the boundary effect. Boundary microphones exhibit more accurate definition due to their being uninhibited by the comb filtering effects caused by wave cancellation from nearby boundaries – placing the mics on the boundary itself reduces such an undesirable effect.
Following this, a rusty, vintage tube microphone was placed in the corridor outside the live room in order to capture what I have come to regard as “a bit of fun” – special effect ambience that you can take or leave, depending on taste. Just compress the crap out of it and – presto – instant drum fun.
And so essentially, that was it. All this experimenting resulted in a drum sound that we were very happy with. Have a listen:
No Ambience
Some Ambience
Full Ambience
For the time being, anyway, I’m off to give my fingers a rest from about three hours’ constant tip-tapping. In another post I will elaborate on the mixing process following these techniques, as one or two tricks should be employed in order to suitably manage such a large number of independent signals.