There’s no easy way to say it:
Recording an audiobook is an arduous, laborious and profoundly annoying process.
You will be subject to uncontrollable tummy rumbling.
You will be interrupted by obnoxious motorcyclists.
You will develop a spontaneous interest in hunting every time a seagull circles overhead.
Your will to live will audibly deplete as you try to maintain solid diction in the face of a litany of self-inflicted tongue-twisters, each one more effective than the last at rewiring your brain’s capacity to recognise English as an intelligible language.
Yep. Audiobook production is the Chinese water torture of audio recording.
But fear not, intrepid warrior of self-authored literature – I’m here to give you the do’s and don’t’s of self-produced audiobook recording, straight from the experienced brain of a man who’s done a lot of them. You’ll learn how to treat poor acoustics, how to salvage an underwhelming mic setup, and how to avoid an editing task that leaves you so deprived of sunlight, your next literary work will be called “The Big Book Of Osteoporosis”.
But first, a disclaimer: if, after reading this article, you decide that your noble ambition is starting to sound more like a slowly unfolding nightmare, then there’s no shame in calling in the professionals. My studio and I are set up to handle the whole process, whether you need recording, editing or mastering, I’m perfectly situated to shoulder all the hard work for you. Just drop me a line to chat about it any time.
Otherwise… lace up those hiking boots for our long trek across audiobook country, and let’s make it to the finish line without freezing to death on Editing Mountain, a search-and-rescue helicopter eventually airlifting you out still clutching a manuscript iced open at Chapter 7.
Ready? Let’s go.
1. Preparing Your Script

Before you start recording, make sure your script is ready and easy to follow. Use clear punctuation to guide your pacing and make sure it’s properly formatted. Practise reading your script so you’re familiar with the flow and can avoid unnecessary stops. You will be surprised at how your own sentences are quite adept at tripping you up when read aloud.
An audiobook doesn’t necessarily have to mirror the published work exactly, but any changes you make should be agreed upon upfront with the relevant parties. Be mindful that major publishers or platforms like Audible usually expect a faithful reading of the text, with only minor changes allowed, such as skipping visual elements, fixing typos or adjusting sentence structure for clarity when read aloud.
Ultimately, focus on optimising the audiobook for the ear and be prepared to make adjustments as needed. Just ensure that any changes, especially pacing, are in line with what is expected for the final product.
2. Acoustic Treatment

Occasionally I’m asked to work on a recording made in a less-than-ideal environment. One instance involved a microphone placed inside a small wooden “isolation box” lined with acoustic foam. While it seemed intuitive, a small cavity like this causes strange internal reflections, leading to unwanted resonances – a phenomenon known as “the boundary effect”. It’s like housing the mic inside a bucket; no matter how much foam you add, the sound just bounces around and creates honky overtones. Fixing it required heavy processing to “notch out” problem frequencies, although this can never be done entirely convincingly, and tends to make for a slightly unnatural or “hollow” sound.
Even portable isolation booths and mountable reflection filters won’t solve this problem. The former won’t prevent sound rebounding off the hard surfaces of the room outside, and the latter only shields the rear of the microphone, which is the part of the mic that is designed to reject sound anyway. It does nothing to prevent sound bouncing off the wall behind you and going straight into the front of the mic.
A better approach is to position the microphone away from walls or hard boundaries and treat the room itself. Hanging sheets, duvets, or other soft furnishings will dampen reflections and give a cleaner, drier sound. Larger rooms are generally better, as the sound has more room to dissipate. Small rooms tend to exaggerate low frequencies, making voices unpredictably boomy. While low end EQ can help, the aim is to minimise processing as much as possible.
If space is limited, prioritise killing obvious reflections and keep the microphone as far from walls as possible.
3. Ambient Noise

Ambient noise can be incredibly disruptive, especially for something as mentally fatiguing as recording an audiobook. No amount of improvised acoustic treatment will eliminate the noise of your laptop fan, the traffic outside, roadworks, seagulls, housemates, or any other unwanted sounds. This is a much more tricky problem to solve.
The best defence is to isolate yourself from distractions. Record at the quietest time of day, when there’s little foot traffic, fewer vehicles, and housemates are least likely to disturb you. If possible, choose a room shielded from outside noise. If screaming schoolchildren pass your window at certain times, avoid those times or record elsewhere.
Noise can also come from inside the room. Put your phone on silent, and keep your laptop well away from the mic. Hours of continuous recording will make it heat up, triggering a noisy fan. You’ll still want it within reach, so consider an external monitor, keyboard, and mouse, with the laptop hidden from the mic’s pickup range.
Finally, don’t record on an empty stomach. Nothing is as apathetic about your audiobook project as your belly, and when it wants food, you and all of your listeners will know about it. The constant gurgling and grumbling will become extremely irritating, so eat something beforehand – something light and energy-sustaining – to keep you on top of your game.
4. Time of Day

Reading aloud for hours on end without mistakes can be draining, and you don’t want that fatigue to show in your voice. Choose a time when you’re feeling alert and refreshed – mornings are usually best. Don’t do it when you’re tired or hungry. Whether it’s after a cup of coffee, a good breakfast, or simply when you’re at your peak – the goal is to ensure you’re in a good headspace to tackle long recording sessions smoothly.
It might be tempting to record through the night to avoid ambient noise, but be mindful of how tiredness will impact your voice, especially after a full day of incessant yapping. As the hours tick by, your energy dips, and your voice will sound hoarse, quickly losing any clarity and enthusiasm.
I’ve listened to many audiobooks where the start of a chapter is lively and upbeat, but as the narrator’s stamina wanes, the tone becomes monotonous, only to spring back to life in the next chapter, probably after a well-earned rest.
5. Location & Setting

If you’ve relocated to the quietest room you can find, be mindful of other factors that could affect your performance. For example, if you’re in an attic space with the nearest toilet down a ladder and a flight of stairs, every trip will leave you slightly out of breath upon return. It’s not just about finding somewhere quiet – it also needs to support your comfort, efficiency, and overall performance.
Other factors include:
- Temperature Control – A room that’s too hot or too cold can make it harder to focus, and your vocal performance can suffer. Dry air, in particular, can make your throat feel scratchy or dry.
- Space for Movement – Choose a space with enough room to move comfortably. This can help prevent stiffness or discomfort that could interfere with your performance.
- Creaky Furniture – Squeaky wheels, creaky floorboards and general rustling should all be addressed. If you have a noisy chair, swap it for a quieter one or add a cushion to dampen the sound.
- Lighting – Poor lighting can lead to eye strain and fatigue, especially when reading for long hours. A space with even, natural lighting can keep you alert and focused.
- Comfortable Setup – Is your microphone at the right height? Are you sitting in a way that supports good posture? A comfortable chair, desk, or stand can make a big difference.
- Hydration – Keep water within arm’s reach at all times. A splash of lemon can keep your mouth fresh without adding sugar or dairy, which aren’t good for your voice.
6. Microphone & Interface

Dynamic microphones like the Shure SM7B or Rode PodMic are a good choice for podcasters, but less suited to audiobook production. They excel at rejecting sound from the sides and rear, making them great for noisy environments with multiple people, but they’re less sensitive than condenser mics and need far more gain to capture a clean signal. This means more preamp noise, which requires extra processing to clean it up.
They also demand close positioning for that rich, “broadcaster” tone. Even moving a few inches back causes a noticeable drop in the fullness of your voice. For audiobooks, where consistency is crucial, this “proximity effect” can be a real problem.
Condenser mics like the Rode NT1-A or Audio-Technica AT2020 are far more sensitive, capturing the natural nuances of your voice for a more detailed sound, which is why they’re the go-to choice for audiobooks. The trade-off is that they pick up more ambient noise, which is why it’s important to work in a controlled recording environment. Pair the mic with a good shock mount to reduce vibrations, and a pop filter to tame plosives (those sudden bursts of air from b’s and p’s). The latter is essential, as a condenser’s delicate diaphragm is highly sensitive to these artifacts.
Finally, invest in a reliable audio interface. Most modern models from reputable brands offer clean, quiet preamps (provided you’re not cranking the gain), and low enough latency for audiobook production.
7. Positioning & Posture

If you’re using a physical book or printed manuscript, you will definitely need something to hold your script in place. No rustling of paper allowed! A decent book stand keeps your hands free and posture upright, avoiding the hunching or neck strain that comes from reading at desk level. For digital scripts, an iPad clamp or tablet holder will keep the screen at eye level, reducing the constant downward glance that interrupts flow as your chin meets your chest.
When listening to audiobooks on headphones, I occasionally notice the narrator’s head tilt as they read down the page. It’s subtle, but as they look down, their voice changes in timbre, and the changing axis from the mic creates a slight, audible phase shift. That’s why keeping the script at eye level or slightly below is ideal – it allows for a smooth, natural read without straining or tilting.
If you’ll be reading for hours, make the setup effortless. An adjustable stand or holder lets you find the perfect position so the script is close without leaning or squinting. Comfort matters – a relaxed, open posture leads to a more natural delivery, while discomfort shows up in your performance and means extra work in post to fix awkward pauses or stumbles.
8. Performance

Enunciation is the backbone of a strong audiobook performance. It’s easy to get lost in the flow, but if you start dropping T’s or running words together, listeners will notice. You’re not just reading – you’re crafting a performance for an audience who don’t have the source material in front of them. Every word must be sharp, distinct, and clear.
A second pair of ears following along in real time is the best safeguard against fatigue. An experienced producer or engineer will catch moments where you subconsciously skip a word or blur a sentence, especially late in a session when you’re eager to finish. Hours of narration can be draining, but if you want a clean, professional audiobook, you must be meticulous.
Watch your consonants – they often disappear when you rush. Whether at the end of a word or mid-sentence, they need to be fully formed. A soft “t” can turn “cat” into “ca” and “hat” into “ha,” which confuses the listener. A crisp “t” adds clarity and presence.
And don’t rush. You might want to push through to the end, but your audience will hear it. A hurried delivery sounds flat and uninspired. Slow down, focus on each word, and let the pacing come naturally. Find a rhythm that feels comfortable, but never sacrifice clarity for speed.
9. Duration

You’re not a robot, so don’t try to narrate an eight-hour audiobook in one go, or even two. Pushing beyond a certain point will lead to sloppier takes and a weaker performance, and you’ll just end up making the whole thing take longer.
I’ve worked on a couple of celebrity stocking-filler biographies where expediency clearly trumped quality, as they attempted to cram the entire recording into two consecutive eight-hour days. Big mistake – especially since the performer had apparently never read their own book before. The end result was rubbish, and no amount of editing could fix it.
Aim for a maximum of four hours in a single session. Three is probably better. This is the sweet spot where you can stay sharp, focused and still deliver quality work. Beyond that, your voice will start to tire, your diction will slip, and your concentration will wane. Like singing, acting, or any performance; you need to conserve energy and allow time to reset.
Take breaks every hour or so. A quick stretch, some water, or a breath of fresh air will help refresh your mind and maintain energy. Pacing yourself prevents burnout – the longer you push, the more your body and mind will revolt, so plan your schedule accordingly.
10. Editing

Be vigilant with your real-time editing – you don’t want every mistake, garbled sentence, and stop/restart to be preserved for you to scrutinise later. There will simply be too many of them. Instead, get into the habit of reflexively deleting obvious mistakes and restarting from the same point. You’ll still need to tighten things later, but at least you’ll have one clean, predictable performance without unexpected repeats and debates over which take was better.
This does however present a unique challenge when recording yourself, and underscores the value of working with a competent producer, because wearing the hats of both performer and engineer will split your focus and weaken your delivery.
With a single, full performance recorded, the real editing challenge begins: trimming noise between words, removing unwanted breaths, and smoothing the flow. DAWs offer automation tools like gates and noise reduction, but use them cautiously – no tool is as reliable as the human ear. Over-processing can erase breaths or pauses that give narration its rhythm. Take the time to listen and tweak by hand.
Typical areas of focus include:
- Breaths – In a conversational read, a few can add natural rhythm. But if they’re loud, distracting, or reveal unwanted noise, trim them.
- Noise Reduction – Automation tools can remove hiss, clicks and background rumble, but don’t go overboard, otherwise you’ll strip away subtle k’s and t’s from your speech.
- Mouth Noises – Use your DAW’s editing tools to isolate and remove all those smacks, clicks, and pops. Again, plugins and automation are no substitute for the human ear and manual editing.
- Gap Tightening – Remove long, awkward silences to keep the pace fluid and engaging, but don’t overdo it, or the result will feel rushed and mechanical.
For reference, here are some standard audiobook pacing guidelines:
Between sentences
~0.5–1.0 sec is common. Up to 1.5 sec if the narrator has a slower delivery or there’s a tonal shift.
Between paragraphs
~1.5–2.0 sec is about right. Enough to create a beat, but not feel like a dropped connection.
Pauses over 2 seconds
These start to feel unintended unless there’s a clear narrative reason. In fact, many publishers flag anything over 2 seconds during QC, especially if it’s frequent, as it:
- Breaks listener immersion.
- Can sound like a technical glitch or lazy editing.
- Throws off pacing and rhythm.
11. Mastering

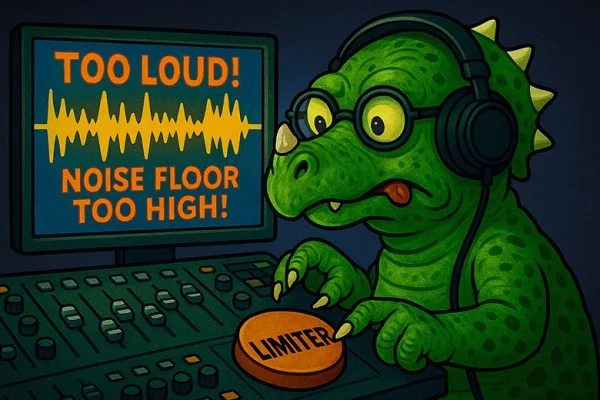
Mastering is crucial to getting your audiobook accepted by platforms like Audible and Spotify. The requirements are strict, so compression and limiting tools will be essential here, but once again, you don’t want to go overboard, otherwise it will sound squashed and unpleasant for the listener.
Here are the key specs you need to meet for ACX (Audible’s Audio Submission Platform):
- MP3 format (192 kbps CBR, 44.1 kHz, mono)
- RMS level: Between -23 dBFS and -18 dBFS
- Peak level: No higher than -3 dBFS
- Noise floor: Should be below -60 dBFS
12. Exporting & Converting

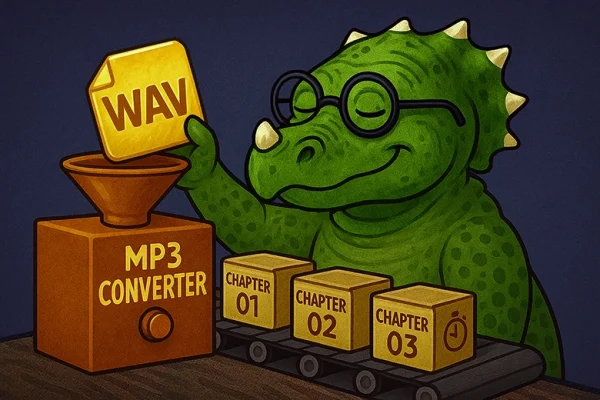
Once you’re satisfied with the editing and mastering, it’s time to export your final files. Export to WAV first, then convert to MP3 – that’s the key to ensuring your audiobook meets Audible’s specs. Remember to leave a few seconds of silence at the beginning and end of each file (I usually leave 1 second at the start and 2 seconds at the end) and to keep chapter files named sequentially.
Conclusion
You should see by now that recording and editing an audiobook is no small task. It’s actually deceptively complicated and exhausting. With the right equipment, environment, and editing tools, it’s absolutely possible to create a professional-sounding product that’s ready for distribution, but it requires ambition, diligence, and a lot of patience, especially if you’re doing it on your own.
If you don’t want to face the challenge alone, then fear not – I’m here to help! My studio is a comfortable environment with a great sounding room and good microphones, plus my ears know exactly what to listen out for as I’m monitoring you from another room. You can absolutely be forgiven for outsourcing the technical side of the whole process. Just getting through the read is exhausting enough.
I offer full audiobook production services, including:
- Full Audiobook Production – From recording to mastering, I’ll handle every aspect of your audiobook production.
- Audio Editing & Mastering – Clean up your audio, remove background noise, adjust pacing, and ensure your audiobook meets Audible’s strict standards.
- Consulting & Guidance – If you’re recording yourself and need professional advice, I can guide you through the process.
If you’re ready to get started or need advice on any part of the audiobook production process, get in touch! I’m here to help make your audiobook the best it can be.


